Search Results
137 results found with an empty search
- My New Boss is Goofy - A Heartwarming Slice-of-Life Journey - and full of Curry
Join us as we delve into the delightful world of "My New Boss is Goofy," a charming slice-of-life comedy anime that follows the adventures of Aoi, a fresh graduate navigating her new job in a small company with an eccentric boss. Discover the heartwarming tale of Aoi as she adapts to her new job and learns to embrace her goofy boss in this simple yet endearing story. While devoid of major plot twists, "My New Boss is Goofy" offers a treasure trove of heartwarming moments and laughter-inducing scenes. Although not groundbreaking, the anime boasts solid animation, with well-designed characters and detailed backgrounds that set the stage for Aoi's quirky escapades. "My New Boss is Goofy" is an endearing anime choice for those seeking a light-hearted, easy-going experience. Join Aoi as she embarks on a journey filled with humor and heart, making each episode a sweet escape into the world of quirky workplace dynamics. Now for the curry: Episode five - at the curry restaurant **Chicken Curry Recipe:** **Ingredients:** - 1 lb (450g) boneless, skinless chicken thighs, cut into bite-sized pieces - 1 onion, finely chopped - 2 cloves garlic, minced - 1-inch piece of ginger, grated - 2 tablespoons vegetable oil - 2 tablespoons curry powder - 1 teaspoon ground cumin - 1 teaspoon ground coriander - 1/2 teaspoon turmeric - 1/4 teaspoon cayenne pepper (adjust to your preferred level of spiciness) - 1 can (14 oz or 400g) diced tomatoes - 1 can (14 oz or 400ml) coconut milk - Salt and pepper, to taste - Fresh cilantro, for garnish (optional) - Cooked rice or naan bread, for serving **Instructions:** 1. In a large skillet or saucepan, heat the vegetable oil over medium heat. 2. Add the chopped onion, garlic, and ginger. Sauté for a few minutes until the onions are soft and translucent. 3. Add the chicken pieces and cook until they are no longer pink, stirring occasionally. 4. Stir in the curry powder, ground cumin, ground coriander, turmeric, and cayenne pepper. Cook for 2-3 minutes to toast the spices and develop flavor. 5. Add the diced tomatoes with their juice. Simmer for 5-7 minutes, allowing the mixture to thicken and the flavors to meld. 6. Pour in the coconut milk and simmer for an additional 10-15 minutes, or until the chicken is cooked through and the sauce has thickened. 7. Season with salt and pepper to taste. Adjust the level of spiciness by adding more cayenne if desired. 8. Serve the chicken curry hot over cooked rice or with naan bread. Garnish with fresh cilantro, if desired. **Nutritional Information (Approximate, per serving):** - Calories: 400-450 - Protein: 25-30g - Carbohydrates: 15-20g - Fat: 25-30g - Fiber: 3-5g - Sugars: 4-6g - Sodium: 700-800mg (varies based on ingredients) - Vitamin A: 10-20% DV - Vitamin C: 10-15% DV - Calcium: 4-6% DV - Iron: 15-20% DV
- The best pasta ever!!! Shirou and Luna chow down
Shirou and Luna are having dinner together at his apartment. Shirou makes a simple pasta dish with tomato sauce and Parmesan cheese, and they eat it together at the kitchen table. The scene is significant for a few reasons. First, it is one of the few times in the series where Shirou and Luna are able to relax and enjoy each other's company without having to worry about the dangers of the Animus or the Anima Mundi. Second, the pasta dish that Shirou makes is a symbol of his humanity and his desire to connect with Luna on a deeper level. Finally, the scene is also visually memorable, with the close-ups of the pasta and the way that Shirou and Luna eat it together conveying a sense of intimacy and closeness. In addition to its significance to the story and characters, the pasta scene in Anima is also simply a very enjoyable scene to watch. The food looks delicious, and the way that Shirou and Luna eat it together is both realistic and romantic. It is a scene that has stayed with many viewers long after they have finished watching the series. Here is a quote from the episode that highlights the significance of the pasta scene: Luna: "Shirou, this pasta is delicious. It's the best pasta I've ever had." Shirou: "I'm glad you like it. I wanted to make something special for you." This exchange shows how the pasta dish is more than just a meal for Shirou and Luna. It is a symbol of their love and respect for each other. classic recipe for pasta with tomato sauce and grated Parmesan cheese: Ingredients: - 8 ounces (about 225 grams) of your favorite pasta (spaghetti, fettuccine, penne, etc.) - 2 tablespoons extra-virgin olive oil - 1 small onion, finely chopped - 2 cloves garlic, minced - 1 (28-ounce) can of crushed tomatoes or tomato passata - 1 teaspoon sugar (to balance the acidity of the tomatoes) - Salt and black pepper, to taste - Pinch of red pepper flakes (optional, for a bit of heat) - Fresh basil leaves, torn or chopped, for garnish - Freshly grated Parmesan cheese Instructions: 1. Cook the Pasta: - Bring a large pot of salted water to a boil. - Add the pasta and cook according to the package instructions until it is al dente. This usually takes about 8-10 minutes, but follow the package instructions for the exact timing. - When the pasta is done, reserve a cup of the pasta cooking water, and then drain the pasta. 2. Make the Tomato Sauce: - In a large skillet or saucepan, heat the olive oil over medium heat. - Add the chopped onion and cook for about 5 minutes, or until it becomes translucent and slightly golden. - Stir in the minced garlic and cook for an additional 30 seconds until fragrant. - Add the crushed tomatoes or tomato passata, sugar, salt, black pepper, and red pepper flakes (if using). Stir to combine. - Reduce the heat to low, cover the pan, and let the sauce simmer for about 15-20 minutes, stirring occasionally. This will allow the flavors to meld, and the sauce will thicken slightly. 3. Toss the Pasta with the Sauce: - Add the drained pasta to the tomato sauce in the skillet. - Toss the pasta in the sauce until it's well-coated. If the sauce is too thick, you can add a bit of the reserved pasta cooking water to reach your desired consistency. - Cook the pasta in the sauce for an additional 2-3 minutes, allowing it to absorb some of the flavors. 4. Serve: - Divide the pasta with tomato sauce among serving plates. - Garnish with freshly torn or chopped basil leaves and a generous amount of grated Parmesan cheese. 5. Enjoy: - Serve immediately, and offer additional grated Parmesan at the table for those who want more. This recipe is a simple and delicious way to enjoy pasta with tomato sauce and Parmesan cheese. You can also customize it by adding ingredients like cooked meatballs or sautéed mushrooms for extra flavor. The nutritional value of a dish of pasta with tomato sauce and grated Parmesan cheese can vary depending on the specific ingredients and portion sizes you use. Here's an approximate breakdown of the nutritional values for a typical serving: - Calories: A serving of pasta with tomato sauce and Parmesan cheese typically contains around 350-450 calories, depending on the type and amount of pasta and the quantity of cheese and sauce used. - Carbohydrates: The main source of carbohydrates comes from the pasta, with around 60-80 grams of carbohydrates per serving, depending on the type and portion size. - Protein: Pasta with Parmesan cheese provides around 10-15 grams of protein per serving. If you add meat or other protein sources, this amount will be higher. - Fat: The dish contains approximately 10-15 grams of fat per serving, mainly from the olive oil, Parmesan cheese, and any other added fats. - Fiber: Pasta dishes typically provide some dietary fiber from the pasta and tomato sauce, which may contribute around 3-5 grams of fiber per serving. - Vitamins and Minerals: This dish is a good source of various vitamins and minerals, particularly from the tomato sauce. It contains vitamin C, vitamin A, potassium, and other nutrients. - Sodium: The sodium content can vary depending on the brand and type of crushed tomatoes and Parmesan cheese used. Tomato sauce can be relatively high in sodium, so it's essential to check labels if you're monitoring your sodium intake.
- Yowamushi Pedal: eating spare ribs after every race!!!!!
Yowamushi Pedal, also known as Weak Pedal, is a Japanese sports anime and manga series about cycling. The series follows Sakamichi Onoda, a high school student who is passionate about cycling but has no formal training. When he joins the Sohoku High School cycling club, he meets a group of talented cyclists who help him to develop his potential. One of the things that sets Yowamushi Pedal apart from other cycling anime is its focus on the social and emotional aspects of the sport. The series shows how cycling can bring people together and help them to overcome their challenges. Another unique aspect of Yowamushi Pedal is its tradition of eating spare ribs after races. The spare ribs are a symbol of the team's camaraderie and their shared love of cycling. In one episode of the anime, the Sohoku team is competing in a major race. The team is exhausted after the race, but they are also exhilarated. They gather at a restaurant to celebrate their victory and to eat spare ribs. As they eat, the team reflects on their race and their goals for the future. They also talk about their friendship and how much they mean to each other. The spare ribs meal is a time for the team to bond and to celebrate their accomplishments. The spare rib tradition is a reminder that Yowamushi Pedal is more than just a cycling anime. It is a show about friendship, teamwork, and overcoming challenges. Oven-cooked lamb spare ribs, followed by grilling them on the BBQ. **Ingredients:** 2 to 3 pounds of lamb spare ribs For the Marinade: 4 table spoons ketchup 3 tablespoons teriyaki 1 teaspoon soya **Instructions:** **1. Preparing the Marinade:** a. In a bowl, combine all 3 and mix well **2. Marinating the Ribs:** a. Place the lamb spare ribs in a large resealable plastic bag or a shallow dish. b. Pour the marinade over the ribs, ensuring they are well coated. Seal the bag or cover the dish and refrigerate for at least 2 hours, but ideally overnight for maximum flavor. **3. Oven Cooking:** a. Preheat your oven to 350°F (175°C). b. Place the marinated lamb spare ribs on a wire rack set in a baking sheet lined with aluminum foil to catch any drips. c. Roast the ribs in the preheated oven for about 45-60 minutes, or until they are cooked through. You can use a meat thermometer to check that the internal temperature reaches 145°F (63°C). **4. Grilling on the BBQ:** a. Preheat your BBQ to medium-high heat and oil the grill grates to prevent sticking. b. Transfer the oven-cooked lamb spare ribs to the preheated BBQ. c. Grill the ribs for an additional 10-15 minutes, turning them occasionally and basting with any remaining marinade. The BBQ grilling gives the ribs a smoky and charred flavor. d. brush BBQ sauce on the ribs after grilling **5. Check for Doneness:** a. The lamb spare ribs are done when they reach an internal temperature of 145°F (63°C). Ensure they are properly cooked using a meat thermometer. **6. Rest and Serve:** a. Allow the grilled lamb spare ribs to rest for a few minutes before slicing them between the bones into individual portions. **Nutritional Information (Approximate, per 3-ounce (85g) serving):** - Calories: 180-220 kcal - Protein: 19-25g - Fat: 11-15g - Carbohydrates: 2-3g - Fiber: 0-1g - Sugars: 0-1g - Sodium: 200-250mg Please keep in mind that the nutritional values can vary based on the specific cuts of lamb and the amount of marinade used. Adjustments to the recipe and serving sizes will affect the nutritional content.
- Food Wars!: Shokugeki no Soma (食戟のソーマ). Pad Thai at its best
Food Wars!: Shokugeki no Soma (食戟のソーマ). This anime follows the story of Soma Yukihira, a young chef who dreams of surpassing his father's culinary skills. He enrolls in Totsuki Culinary Academy, a prestigious school for chefs where only the most talented students succeed. In the anime, there are many different and delicious dishes that are featured, but the pad thai that is made by Soma Yukihira is particularly notable. It is made with fresh ingredients and a unique cooking technique that results in a dish that is both flavorful and visually appealing. Chicken Pad Thai with an option for a gluten-free version. Keep in mind that the nutritional information provided is an approximation and may vary depending on the specific ingredients and portion sizes you use. **Chicken Pad Thai Recipe** **Ingredients:** - 8 oz (about 225g) rice noodles (use rice noodles labeled gluten-free for a gluten-free option) - 2 boneless, skinless chicken breasts, thinly sliced - 2 tablespoons vegetable oil - 3 cloves garlic, minced - 2 eggs, lightly beaten - 1 cup bean sprouts - 1/2 cup chopped green onions - 1/4 cup chopped cilantro - 1/4 cup chopped roasted peanuts - Lime wedges for garnish **For the Pad Thai Sauce:** - 3 tablespoons tamarind paste - 2 tablespoons fish sauce (use gluten-free fish sauce for a gluten-free version) - 2 tablespoons sugar - 1 teaspoon chili sauce or crushed red pepper flakes (adjust to your preferred level of spiciness) **Instructions:** 1. **Prepare the Noodles:** - If using regular rice noodles, soak them in warm water for about 30 minutes until they're pliable. If using gluten-free rice noodles, follow the package instructions. - Drain and set aside. 2. **Make the Pad Thai Sauce:** - In a small bowl, mix together the tamarind paste, fish sauce, sugar, and chili sauce until well combined. Adjust the sugar and spice level to your taste. 3. **Cook the Chicken:** - Heat 1 tablespoon of vegetable oil in a large wok or skillet over high heat. - Add the chicken slices and stir-fry until they're cooked through and slightly browned. Remove the chicken from the pan and set aside. 4. **Scramble the Eggs:** - In the same pan, add the remaining tablespoon of vegetable oil. - Add minced garlic and stir-fry for about 30 seconds. - Push the garlic to one side of the pan and pour in the beaten eggs. - Scramble the eggs and then combine them with the garlic. 5. **Assemble the Dish:** - Add the cooked noodles and Pad Thai sauce to the pan. Toss everything together until the noodles are well-coated and heated through. 6. **Add Vegetables:** - Stir in the bean sprouts, green onions, and cooked chicken. Continue to stir-fry for a few minutes until the bean sprouts are slightly wilted. 7. **Serve:** - Serve the Chicken Pad Thai hot, garnished with chopped cilantro, roasted peanuts, and lime wedges. **Nutritional Information (Approximate, per serving):** - Calories: 450-500 - Protein: 25g - Carbohydrates: 50g (or less for gluten-free rice noodles) - Fat: 17g - Fiber: 3g - Sugar: 7g - Sodium: 1000-1200mg (varies based on fish sauce and chili sauce) - Please note that these values are approximate and can vary depending on portion sizes and specific ingredients used. Adjust the portion sizes and ingredients to meet your dietary needs.
- Pizza from Napoli to the Quintessential Quintuplets
I am a big fan of The Quintessential Quintuplets, and I also love pizza. So, when I heard that there was a promotion between the two, I was very excited. I decided to go to Pizza Hut and try the special Quintessential Quintuplets pizza. The pizza was delicious! The crust was perfectly cooked, and the toppings were generous and evenly distributed. The cheese was melted to perfection, and the sauce was tangy and flavorful. The pizza was also very large, so it was perfect for sharing with friends or family. I also enjoyed the special Quintessential Quintuplets packaging. The box was decorated with illustrations of the five Nakano sisters, and it also came with a lottery number. I won a special rubber keychain that plays audio when pressed. Overall, I had a great experience eating Quintessential Quintuplets pizza at Pizza Hut. The pizza was delicious, and the packaging was fun and unique. I would definitely recommend this pizza to any fan of the anime or pizza in general. Okay in all honesty there is no pizza like a true Neapolitan pizza - enjoy Professional Neapolitan Pizza Dough Recipe: Ingredients for the Dough: - 647 grams of high-quality all-purpose flour - 517 grams of filtered water - 2.3 grams of dry yeast - 20 grams of extra-virgin olive oil - 16 grams of fine sea salt Instructions: 1. Mixing the Dough: a. Begin by meticulously sifting the all-purpose flour to ensure its fine texture. Place it in a large mixing bowl. b. In a separate container, dissolve the dry yeast in the filtered water, stirring gently. Allow this mixture to rest briefly. c. Pour the yeast-infused water into the bowl of sifted flour, followed by the addition of the extra-virgin olive oil and the fine sea salt. d. Knead this amalgamation meticulously for approximately 30 minutes until a smooth, elastic, and non-sticky dough is achieved. 2. Dough Division: a. Divide the master dough into four equal portions, shaping them into uniform balls with smooth surfaces. b. Lightly coat each dough ball with olive oil to prevent drying, and then individually encase them in cling film. 3. Refrigeration: a. Store the dough balls in the refrigerator and allow them to rest for a minimum of 24 hours, during which the flavors will mature and the dough will become easier to work with. 4. Shaping the Pizza: a. When ready to prepare the pizzas, remove the dough from the refrigerator. Allow the dough to come to room temperature for about an hour to make it more pliable. b. On a floured surface, gently shape each dough ball into a 12-inch pizza round with a classic, thin Neapolitan crust. 5. Assembling the Pizza: a. Spread a thin layer of grated fresh skinless tomato sauce on the dough, leaving a small border for the crust. b. Place slices of buffalo mozzarella cheese evenly over the sauce. c. Drizzle a minimal amount of extra-virgin olive oil over the pizza for added flavor. 6. Baking the Pizza: a. To achieve an authentic Neapolitan pizza, it is recommended to use a pizza oven preheated to the maximum temperature for a quick cook. b. In a pizza oven, bake each pizza for 3 to 4 minutes or until the crust attains its desired texture. c. If a pizza oven is unavailable, use your regular oven at its highest temperature setting to achieve a similar result. 7. Final Touch and Serving: a. Once the pizza is removed from the oven, garnish it with fresh basil leaves for a burst of flavor and aroma. 8. Slice, serve, and savor your professionally prepared Neapolitan Margherita Pizza with buffalo mozzarella and fresh skinless tomato sauce. Enjoy the fruits of your culinary craftsmanship! This recipe will deliver a Neapolitan pizza that embodies the traditional essence and quality of this Italian classic. **Nutritional Value (per serving, assuming the recipe makes 4 servings):** - Calories: 440-460 kcal - Total Fat: 11-12 grams - Saturated Fat: 3-4 grams - Cholesterol: 20-25 mg - Sodium: 800-900 mg - Total Carbohydrates: 69-70 grams - Dietary Fiber: 3-4 grams - Sugars: 1-2 grams - Protein: 13-14 grams Please note that these values are rough estimates and can vary based on the specific brands and quantities of ingredients you use. For more accurate nutritional information, you may want to use a nutritional calculator or consult the nutrition labels on the products you use.
- Naruto, Monkey and Ms. Koizumi: Ramen challenge: recipes below
Naruto Uzumaki Naruto Uzumaki is a young ninja who loves ramen more than anything else in the world. He is always eating it, and he has a favorite ramen shop called Ichiraku Ramen. Naruto enjoys ramen in a very simple way. He loves the rich broth, the chewy noodles, and the toppings like pork belly, narutomaki (fish cake), and green onions. He often eats ramen with his friends and teammates, and he always has a big smile on his face when he is doing it. Monkey D. Luffy Monkey D. Luffy is a pirate captain who loves to eat anything, but his favorite food is meat. He also enjoys ramen, but he likes to add his own unique twist to it. Luffy often eats ramen with a lot of meat, and he sometimes even adds things like chili peppers or mayonnaise to it. He doesn't care if his ramen is messy or unconventional, as long as it tastes good to him. Ms. Koizumi Ms. Koizumi is a high school student who is passionate about ramen. She has a deep knowledge of ramen, and she is always on the lookout for new and interesting ramen shops to try. Ms. Koizumi enjoys ramen in a very refined way. She appreciates the artistry of the broth and the toppings, and she takes her time to savor each bite. She often eats ramen alone, and she enjoys the peace and quiet of her own company. Comparison Naruto enjoys ramen in a simple and straightforward way. He loves the classic taste of ramen, and he doesn't need anything fancy to make it enjoyable. Luffy enjoys ramen in a more adventurous way. He is not afraid to experiment with different flavors and toppings, and he always finds a way to make ramen his own. Ms. Koizumi enjoys ramen in a more sophisticated way. She appreciates the craftsmanship of ramen, and she enjoys taking her time to savor each bite. Conclusion All three of these anime characters love ramen in their own unique way. Naruto loves the classic taste of ramen, Luffy loves to experiment with different flavors and toppings, and Ms. Koizumi appreciates the craftsmanship of ramen. No matter how you enjoy it, ramen is a delicious and satisfying food that can be enjoyed by people of all ages. Here are three different ramen recipes with varying levels of complexity and flavor: **1. Simple Beef Ramen:** This is a basic beef ramen recipe that's easy to prepare. **Ingredients:** - 2 packs of instant ramen noodles - 1 pound of thinly sliced beef (such as sirloin or ribeye) - 4 cups of beef broth - 2 cloves of garlic, minced - 2 tablespoons of soy sauce - 1 teaspoon of sesame oil - 2 green onions, chopped - Salt and pepper to taste **Instructions:** 1. In a large pot, bring the beef broth to a boil. 2. In a separate pot, cook the instant ramen noodles according to the package instructions. Drain and set aside. 3. In a skillet, heat the sesame oil over medium heat. Add the minced garlic and sliced beef, and cook until the beef is browned. Season with salt and pepper. 4. Add the cooked ramen noodles to the boiling beef broth and simmer for a few minutes. 5. Stir in the soy sauce and sliced green onions. 6. Serve the beef ramen in bowls, topping it with the cooked beef slices. **2. Outrageous Loaded Ramen:** This recipe takes ramen to the next level with a mix of unique ingredients. **Ingredients:** - 2 packs of instant ramen noodles - 4 cups of chicken or vegetable broth - 1 cup of shredded rotisserie chicken - 1/2 cup of sautéed mushrooms - 1 soft-boiled egg - 1/4 cup of corn kernels - 1/4 cup of sliced scallions - 1/4 cup of kimchi - 1 tablespoon of sesame seeds - 1 tablespoon of sriracha sauce (adjust to taste) - Nori seaweed sheets for garnish **Instructions:** 1. Prepare the instant ramen noodles according to the package instructions and set aside. 2. In a large pot, bring the broth to a simmer. 3. Divide the cooked noodles between bowls and top with shredded chicken, sautéed mushrooms, corn, and sliced scallions. 4. Carefully slice the soft-boiled egg in half and add it to each bowl. 5. Add a spoonful of kimchi and sprinkle with sesame seeds. 6. Drizzle sriracha sauce over the top and garnish with nori seaweed sheets. **3. Sophisticated Miso Ramen:** This recipe features a more refined flavor profile with miso paste and complex broths. **Ingredients:** - 2 packs of fresh ramen noodles - 4 cups of pork or chicken broth - 2 tablespoons of white miso paste - 1/2 cup of sliced shiitake mushrooms - 1/2 cup of baby bok choy, halved - 1 soft-boiled marinated egg - 1/4 cup of sliced bamboo shoots - 2 slices of chashu pork (or substitute with pork belly) - Sliced green onions for garnish - Black garlic oil (optional) **Instructions:** 1. Cook the fresh ramen noodles according to the package instructions and set aside. 2. In a pot, heat the broth and whisk in the white miso paste until fully incorporated. Bring it to a gentle simmer. 3. Add the sliced shiitake mushrooms and bok choy to the broth and simmer until they are tender. 4. Divide the cooked noodles between bowls and pour the miso broth over them. 5. Top with a soft-boiled marinated egg, bamboo shoots, chashu pork, and sliced green onions. 6. Drizzle with black garlic oil for extra flavor, if desired. Enjoy your ramen adventure, whether you prefer a simple, outrageous, or sophisticated bowl!
- Fullmetal Alchemist: vanilla Gelato -Edward Elric can't get enough
Edward Elric has a sweet tooth, and he loves ice cream, especially vanilla ice cream. He often enjoys a cone or cup of ice cream after a long day of alchemy or adventure. One day, Edward was walking through town when he saw an ice cream vendor. He couldn't resist, and he ordered a large cone of vanilla ice cream. He took a big bite, and his eyes lit up with delight. The ice cream was cold and creamy, and it melted in his mouth. Edward savored every bite, and he closed his eyes in bliss. "This is the best ice cream ever!" he exclaimed. Edward finished his ice cream in no time, and he threw away the cone. He licked his lips and smiled. "That was delicious," he said. "I'll have to come back here again soon." Vanilla gelato is a delicious and creamy Italian frozen dessert that's similar to ice cream but typically has a slightly lower fat content and a more intense vanilla flavor. Here's a basic recipe for homemade vanilla gelato: Ingredients: - 2 cups whole milk - 1 cup heavy cream - 3/4 cup granulated sugar - 4 large egg yolks - 2 teaspoons pure vanilla extract - 1 vanilla bean (optional, for extra flavor) - A pinch of salt Instructions: 1. If you're using a vanilla bean, split it open lengthwise with a knife and scrape out the seeds with the back of the knife. Set the seeds aside. 2. In a medium saucepan, combine the milk and heavy cream. If you're not using a vanilla bean, add the vanilla extract at this stage. Heat the mixture over medium heat, stirring occasionally, until it's hot but not boiling. You should see small bubbles forming around the edges of the pan. 3. In a separate bowl, whisk together the egg yolks and sugar until the mixture becomes pale and slightly thick. 4. Gradually add a small amount of the hot milk and cream mixture to the egg yolks and sugar while whisking constantly. This will temper the eggs, preventing them from curdling. Continue to slowly add the hot mixture while stirring. 5. Pour the tempered egg and milk mixture back into the saucepan with the remaining milk and cream. If you're using a vanilla bean, add the scraped seeds and the empty vanilla bean pod to the mixture. 6. Cook over medium-low heat, stirring constantly with a wooden spoon, until the mixture thickens and coats the back of the spoon. This should take about 5-7 minutes. Do not let it boil. 7. Remove the mixture from the heat and strain it through a fine-mesh sieve into a clean bowl to remove any egg or vanilla bean pieces. If you used a vanilla bean, make sure to scrape any remaining seeds from the pod into the mixture before discarding it. 8. Add a pinch of salt to the mixture and stir it in. Let the mixture cool to room temperature, and then cover it and refrigerate for at least 4 hours, or until it's completely chilled. 9. Once the mixture is cold, churn it in an ice cream or gelato maker according to the manufacturer's instructions. It will take about 20-30 minutes to reach a creamy, gelato-like consistency. 10. Transfer the churned gelato to an airtight container and freeze it for a few hours or until it firms up to your desired consistency. Remember to remove the vanilla bean pod if you used one. Serve your homemade vanilla gelato in bowls or cones, and enjoy the creamy, rich, and intensely vanilla-flavored treat!
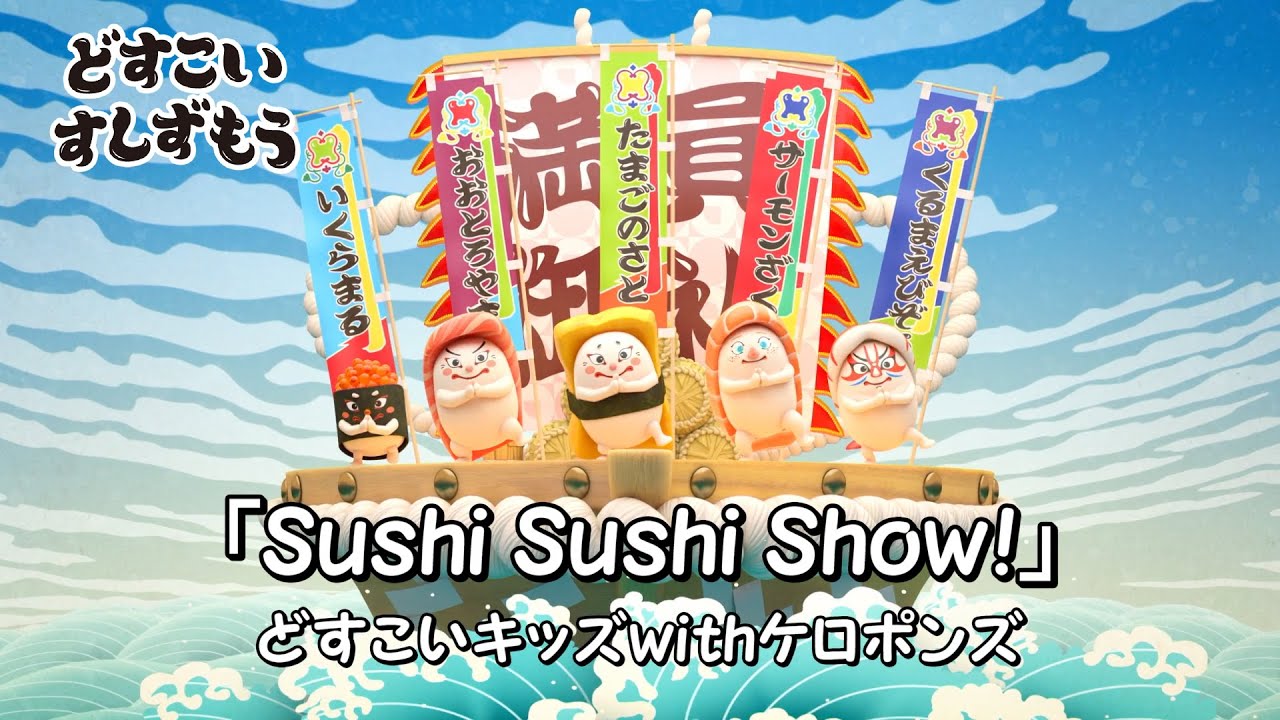
- Sushi fit for a Sumo: salmon maki
Sushi Sumo is a 2021 Japanese anime television series produced by MAPPA. The series follows the story of a group of sushi entrees who compete in sumo wrestling tournaments. The series is known for its unique premise, its humor, and its heartwarming characters. One of the things that makes Sushi Sumo so enjoyable is its cast of characters. Each sushi entree has its own unique personality and backstory. For example, there is Maguro, the tuna sushi who is a natural leader and a fierce competitor. There is also Ebi, the shrimp sushi who is shy and timid but always willing to give her best effort. The characters in Sushi Sumo are all relatable and likable, and it is easy to root for them to succeed. Another thing that makes Sushi Sumo so enjoyable is its humor. The series is full of slapstick comedy and witty dialogue. The characters often get themselves into funny situations, and the show does a great job of subverting expectations. Sushi Sumo is also a very heartwarming series. The characters learn to overcome their challenges and support each other through thick and thin. Overall, Sushi Sumo is a very well-made anime series. It has a unique and interesting premise, a cast of relatable characters, and a good mix of humor and heartwarming moments. The series is also visually stunning, with colorful animation and fluid fight scenes. If you are a fan of anime, comedy, or sumo wrestling, then I highly recommend checking out Sushi Sumo. Salmon Maki Sushi, along with a step-by-step guide. This recipe will make about 2-3 rolls, depending on how thick you slice them. You can also turn these into Salmon and Avocado Maki by adding avocado slices. **Ingredients:** For the Sushi Rice: - 1 cup sushi rice - 2 cups water - 1/4 cup rice vinegar - 2 tablespoons sugar - 1 teaspoon salt For the Salmon Maki: - 2 sheets of nori (seaweed) - 1/2 pound fresh salmon, sashimi-grade - Soy sauce for dipping - Wasabi and pickled ginger (optional) **Instructions:** **Preparing the Sushi Rice:** 1. Rinse the sushi rice under cold water until the water runs clear. Drain the rice. 2. In a saucepan, combine the rinsed rice and 2 cups of water. Bring to a boil over high heat. 3. Once it boils, reduce the heat to low, cover, and simmer for about 15 minutes, or until the rice is tender and the water is absorbed. 4. In a small saucepan, combine the rice vinegar, sugar, and salt. Heat over low until the sugar and salt dissolve. 5. Once the rice is cooked, transfer it to a large mixing bowl, and while it's still hot, pour the vinegar mixture over the rice. Mix gently with a wooden spatula, fanning the rice to cool it down. 6. Continue to fold and mix until the rice is at room temperature. It should be glossy and slightly sticky. **Preparing the Salmon Maki:** 1. Place a bamboo sushi rolling mat (makisu) on a clean surface. Lay a sheet of plastic wrap over the mat. 2. Place a sheet of nori, shiny side down, on the plastic wrap. 3. Wet your hands to prevent the rice from sticking, and take a handful of sushi rice. Spread it evenly over the nori, leaving about half an inch of nori without rice at the top. 4. Lay thin slices of fresh salmon over the rice. 5. Carefully lift the bamboo mat and nori, and start rolling the nori around the filling, using the bamboo mat to shape it into a tight cylinder. 6. Moisten the exposed nori with a little water and press to seal the roll. 7. Use a sharp knife to slice the roll into bite-sized pieces. Wet the knife between cuts to prevent sticking. 8. Arrange your Salmon Maki on a serving platter. Serve with soy sauce, wasabi, and pickled ginger.
- Restaurant to Another World: teppanyaki-style beef and vegetables.
Restaurant to Another World is one of my favorite anime shows. It is a very relaxing and enjoyable show to watch. The food looks amazing, and the characters are all very likable. I especially enjoy the way the show explores the different cultures and customs of the different worlds that the restaurant opens to. teppanyaki-style beef and vegetables: Ingredients: - 1 pound of thinly sliced beef (ribeye or sirloin works well) - 1 zucchini, sliced into thin strips - 1 onion, sliced into rings - 1 bell pepper, sliced into strips - 1 carrot, thinly sliced - 8-10 large shrimp, peeled and deveined - 2 cups of bean sprouts - 2 tablespoons of vegetable oil - Salt and pepper to taste **For the Teppanyaki Sauce:** - 1/2 cup soy sauce - 2 tablespoons sake (Japanese rice wine) - 2 tablespoons mirin (sweet rice wine) - 2 tablespoons sugar - 1 teaspoon grated ginger - 1 teaspoon minced garlic **Instructions:** 1. Prepare the Teppanyaki Sauce: - In a small saucepan, combine the soy sauce, sake, mirin, sugar, ginger, and garlic. - Heat the sauce over low heat, stirring until the sugar dissolves. - Once the sugar has dissolved, remove the sauce from the heat and set it aside. 2. Heat the Teppanyaki Grill: - If you have a teppanyaki grill, preheat it to a medium-high heat. If you don't have a teppanyaki grill, you can use a large, flat skillet on your stovetop. 3. Prepare the Vegetables: - Arrange the zucchini, onion, bell pepper, carrot, and bean sprouts on a plate. 4. Cook the Vegetables: - Add 1 tablespoon of vegetable oil to the heated teppanyaki grill or skillet. - Place the vegetables on the grill/skillet and cook them for a few minutes, tossing and turning them with spatulas or cooking chopsticks. Season with salt and pepper as desired. When they are tender and slightly caramelized, transfer them to a serving plate. 5. Cook the Shrimp: - Add the remaining 1 tablespoon of vegetable oil to the grill/skillet. - Place the shrimp on the grill and cook them for 2-3 minutes per side until they turn pink and opaque. 6. Cook the Beef: - Lay the thinly sliced beef on the grill and cook for about 1-2 minutes on each side until they're cooked to your desired level of doneness. Season with a pinch of salt and pepper. 7. Serve: - Arrange the cooked beef and shrimp on the serving plate with the cooked vegetables. - Drizzle the teppanyaki sauce over the cooked ingredients. 8. Serve immediately and enjoy your homemade teppanyaki! Feel free to customize this recipe by adding other vegetables or proteins to your liking. Additionally, you can serve teppanyaki with steamed rice or noodles for a complete meal.
- Origiri and Pokemon: a match made in heaven - Not a donut ... a riceball
Pokémon and onigiri are two of the most iconic Japanese cultural exports. It's no wonder that the two are often paired together, both in real life and in anime. Onigiri are rice balls that are typically filled with savory ingredients such as salmon, tuna, or umeboshi (pickled plum). They are a popular snack or light meal in Japan, and they are often enjoyed on the go. Pokémon, on the other hand, is a global phenomenon that has captured the hearts of fans of all ages. The franchise includes video games, anime, manga, and a wide range of merchandise. The combination of Pokémon and onigiri is a perfect one. Onigiri are a delicious and portable food that is perfect for fueling any adventure, whether you're training to be a Pokémon Master or just exploring the world. Salmon onigiri is a popular and delicious choice. Here's a recipe for Salmon Onigiri: **Ingredients:** - 1 cup sushi rice (short-grain Japanese rice) - 1 1/4 cups water - 2 tablespoons rice vinegar - 1 tablespoon sugar - 1/2 teaspoon salt - 2 to 3 salmon fillets or salmon flakes (cooked and seasoned) - Nori (seaweed) sheets, cut into thin strips - Soy sauce (for dipping, optional) - Optional toppings: toasted sesame seeds, furikake, or thinly sliced green onions **Instructions:** 1. **Prepare the Salmon:** - Cook the salmon fillets by baking, grilling, or pan-searing them until they're cooked through. You can season them with a little salt and pepper or your preferred seasoning. Flake the cooked salmon into small pieces. 2. **Rinse the Rice:** - Place the sushi rice in a fine-mesh strainer and rinse it under cold water until the water runs clear. 3. **Cook the Rice:** - Combine the rinsed rice and 1 1/4 cups of water in a medium saucepan. Bring it to a boil, then reduce the heat to low, cover, and let it simmer for about 15-20 minutes, or until the rice is tender and the water is absorbed. 4. **Season the Rice:** - While the rice is still hot, transfer it to a large bowl. In a separate bowl, mix the rice vinegar, sugar, and salt until the sugar and salt are dissolved. Gently fold this vinegar mixture into the hot rice, being careful not to overmix. This will season the rice. 5. **Form the Onigiri:** - Wet your hands with water to prevent the rice from sticking. Take a small handful of seasoned rice and place it in the palm of your hand. Flatten it slightly and make an indentation in the center with your thumb. Place a small amount of the seasoned salmon flakes in the indentation. 6. **Shape the Rice Ball:** - Cup your hand and gently shape the rice into a triangle, circle, or any shape you prefer. Press the rice firmly to ensure it holds together. 7. **Wrap with Nori:** - Optionally, wrap a strip of nori around the onigiri, securing it with a bit of water. 8. **Serve:** - Serve the salmon onigiri with soy sauce for dipping if desired. You can also sprinkle toasted sesame seeds, furikake, or sliced green onions on top for extra flavor.
- The Yorozuya's Donburi Arc
This episode is a hilarious and heartwarming ode to the classic Japanese dish of donburi. The episode begins with Gintoki, Shinpachi, and Kagura deciding to have a donburi eating contest. They each order a different type of donburi, and the first one to finish their bowl wins. Gintoki orders a gyudon (beef bowl), Shinpachi orders an oyakodon (chicken and egg bowl), and Kagura orders a tendon (tempura bowl). The three of them start eating ravenously, and it's not long before they're all neck-and-neck. However, the contest is interrupted when a group of bandits suddenly attacks the restaurant. Gintoki, Shinpachi, and Kagura put aside their donburi bowls and fight off the bandits. Once the bandits are defeated, the three of them return to their donburi eating contest. In the end, it's Kagura who wins the contest. She finishes her tendon bowl in record time, and Gintoki and Shinpachi are left in awe. The episode ends with the three of them enjoying a delicious meal of donburi together. This episode is one of the best episodes of Gintama because it is both funny and heartwarming. The donburi eating contest is a great example of the show's signature absurdist humor, but the episode also has a lot of heart. The scene where Gintoki, Shinpachi, and Kagura put aside their donburi to fight off the bandits shows how much they care about each other. If you're a fan of Gintama, or if you just love donburi, then I highly recommend checking out this episode. It's sure to leave you with a smile on your face. Donburi is a popular Japanese dish consisting of a bowl of steamed rice topped with various ingredients, often simmered together in a flavorful sauce. One of the most well-known varieties is Gyudon, made with thinly sliced beef. Here's a simple recipe for Gyudon: **Ingredients:** - 1 cup of short-grain Japanese rice - 1/2 pound (225g) thinly sliced beef (such as ribeye or sirloin) - 1 onion, thinly sliced - 2 tablespoons vegetable oil - 2 cups dashi stock (or substitute with beef or chicken broth) - 1/4 cup soy sauce - 2 tablespoons mirin (sweet rice wine) - 2 tablespoons sugar - 2-3 green onions, thinly sliced - Pickled ginger (optional, for garnish) - Furikake (optional, for extra flavor) - Shichimi Togarashi (optional, for spice) **Instructions:** 1. **Prepare the Rice:** - Rinse the rice under cold water until the water runs clear. - Cook the rice according to the package instructions or using a rice cooker. Set it aside and keep it warm. 2. **Prepare the Sauce:** - In a small bowl, mix together the soy sauce, mirin, and sugar until the sugar is dissolved. This will be your sauce for the Gyudon. 3. **Cook the Onions:** - Heat the vegetable oil in a large skillet or frying pan over medium heat. - Add the thinly sliced onions and sauté them until they become translucent and slightly caramelized, which should take about 5 minutes. 4. **Cook the Beef:** - Add the thinly sliced beef to the skillet with the onions. Stir-fry for a few minutes until the beef changes color and is almost cooked through. 5. **Add the Sauce:** - Pour the sauce mixture over the beef and onions in the skillet. 6. **Simmer:** - Add the dashi stock to the skillet and bring it to a simmer. Allow it to simmer for a few minutes, letting the flavors meld together and the beef to cook completely. This should take about 3-5 minutes. 7. **Assemble the Gyudon:** - Spoon a generous amount of the beef, onions, and sauce over a bowl of hot steamed rice. 8. **Garnish:** - Sprinkle the sliced green onions on top of the Gyudon for freshness and color. - If you like, add a small pile of pickled ginger and a sprinkle of furikake for extra flavor. 9. **Serve:** - Gyudon is traditionally served hot, and you can add a pinch of Shichimi Togarashi for some extra spice if you like. Enjoy your homemade Gyudon! It's a delicious and comforting Japanese dish that's easy to prepare at home.
- The best bowl of Ramen: Naruto!!!
Recipe for Naruto's Favorite Ramen Ingredients: 1-2 pounds pork bones 4 liters of water 1 inch of fresh ginger, sliced 1 3-inch strip of kombu (dried kelp) 2 1/2 tablespoons sake 1 1/2 tablespoons soy sauce 1/2 teaspoon sugar 8 tablespoons miso 1/4 teaspoon chili bean paste (optional) Fresh ramen noodles Toppings: chasu pork, narutomaki (fish cake), menma (bamboo shoots), soft-boiled eggs, and green onions Instructions: Rinse the pork bones in cold water and place them in a large pot with the water, ginger, kombu, sake, soy sauce, and sugar. Bring the broth to a boil, then reduce the heat to low and simmer for 2-3 hours, or until the broth is rich and flavorful. Strain the broth into a clean pot and discard the solids. Add the miso to the broth and stir until dissolved. Bring the broth back to a simmer and cook for 5 minutes more. While the broth is cooking, cook the ramen noodles according to package directions. To assemble the ramen, divide the noodles between bowls. Ladle the broth over the noodles and top with the desired toppings. Serve immediately and enjoy! Ramen plays an important role in the Naruto series, both as a comfort food for Naruto and as a symbol of his bond with his friends and family. Naruto's favorite food is ramen from Ichiraku Ramen, a restaurant run by Teuchi and Ayame, who are like surrogate parents to Naruto. Naruto often eats ramen at Ichiraku after training or after completing a mission, and it is a place where he can relax and be himself. Ramen also symbolizes Naruto's bond with his friends and family. In one episode, Naruto challenges Sasuke to a ramen eating contest, and they eat so much ramen that they both pass out. This episode shows how close Naruto and Sasuke are, and how they can always count on each other, even when they are competing. In another episode, Naruto and Jiraiya travel to a village that is famous for its ramen. Naruto challenges the village's best ramen chef to a cooking contest, and he ultimately wins. This episode shows how Naruto has grown and matured, and how he is now able to compete with the best of the best. Overall, ramen is an important part of the Naruto series. It is a comfort food for Naruto, a symbol of his bond with his friends and family, and a reminder of how far he has come.